
【尝试】本地部署openai-whisper,通过 http请求识别
本文介绍了基于FastAPI搭建Whisper语音转文字服务的完整流程。教程包含三个部分:1)创建whisperDemo1.py作为服务端,加载Whisper模型并实现音频文件上传和转录接口;2)编写request001.py客户端脚本,用于测试文件上传功能;3)通过Uvicorn运行服务,支持通过/docs查看API文档。服务支持medium/small/large等不同规模的Whisper模型
·
安装whisper的教程,已在
https://blog.csdn.net/qq_23938507/article/details/149394418
和
https://blog.csdn.net/qq_23938507/article/details/149326290
中说明。
1、创建whisperDemo1.py
from fastapi import FastAPI, UploadFile, File
import whisper
import os

app = FastAPI()

# 加载Whisper模型
model = whisper.load_model("medium")  # 可替换为 small/medium/large


@app.post("/transcribe/")
async def transcribe_audio(file: UploadFile = File(...)):
    try:
        # 临时保存上传的文件[7](@ref)
        temp_path = f"temp_{file.filename}"
        with open(temp_path, "wb") as f:
            f.write(await file.read())

        # 使用Whisper转录[7](@ref)
        result = model.transcribe(temp_path)

        # 删除临时文件
        os.remove(temp_path)

        return {"text": result["text"]}

    except Exception as e:
        return {"error": str(e)}
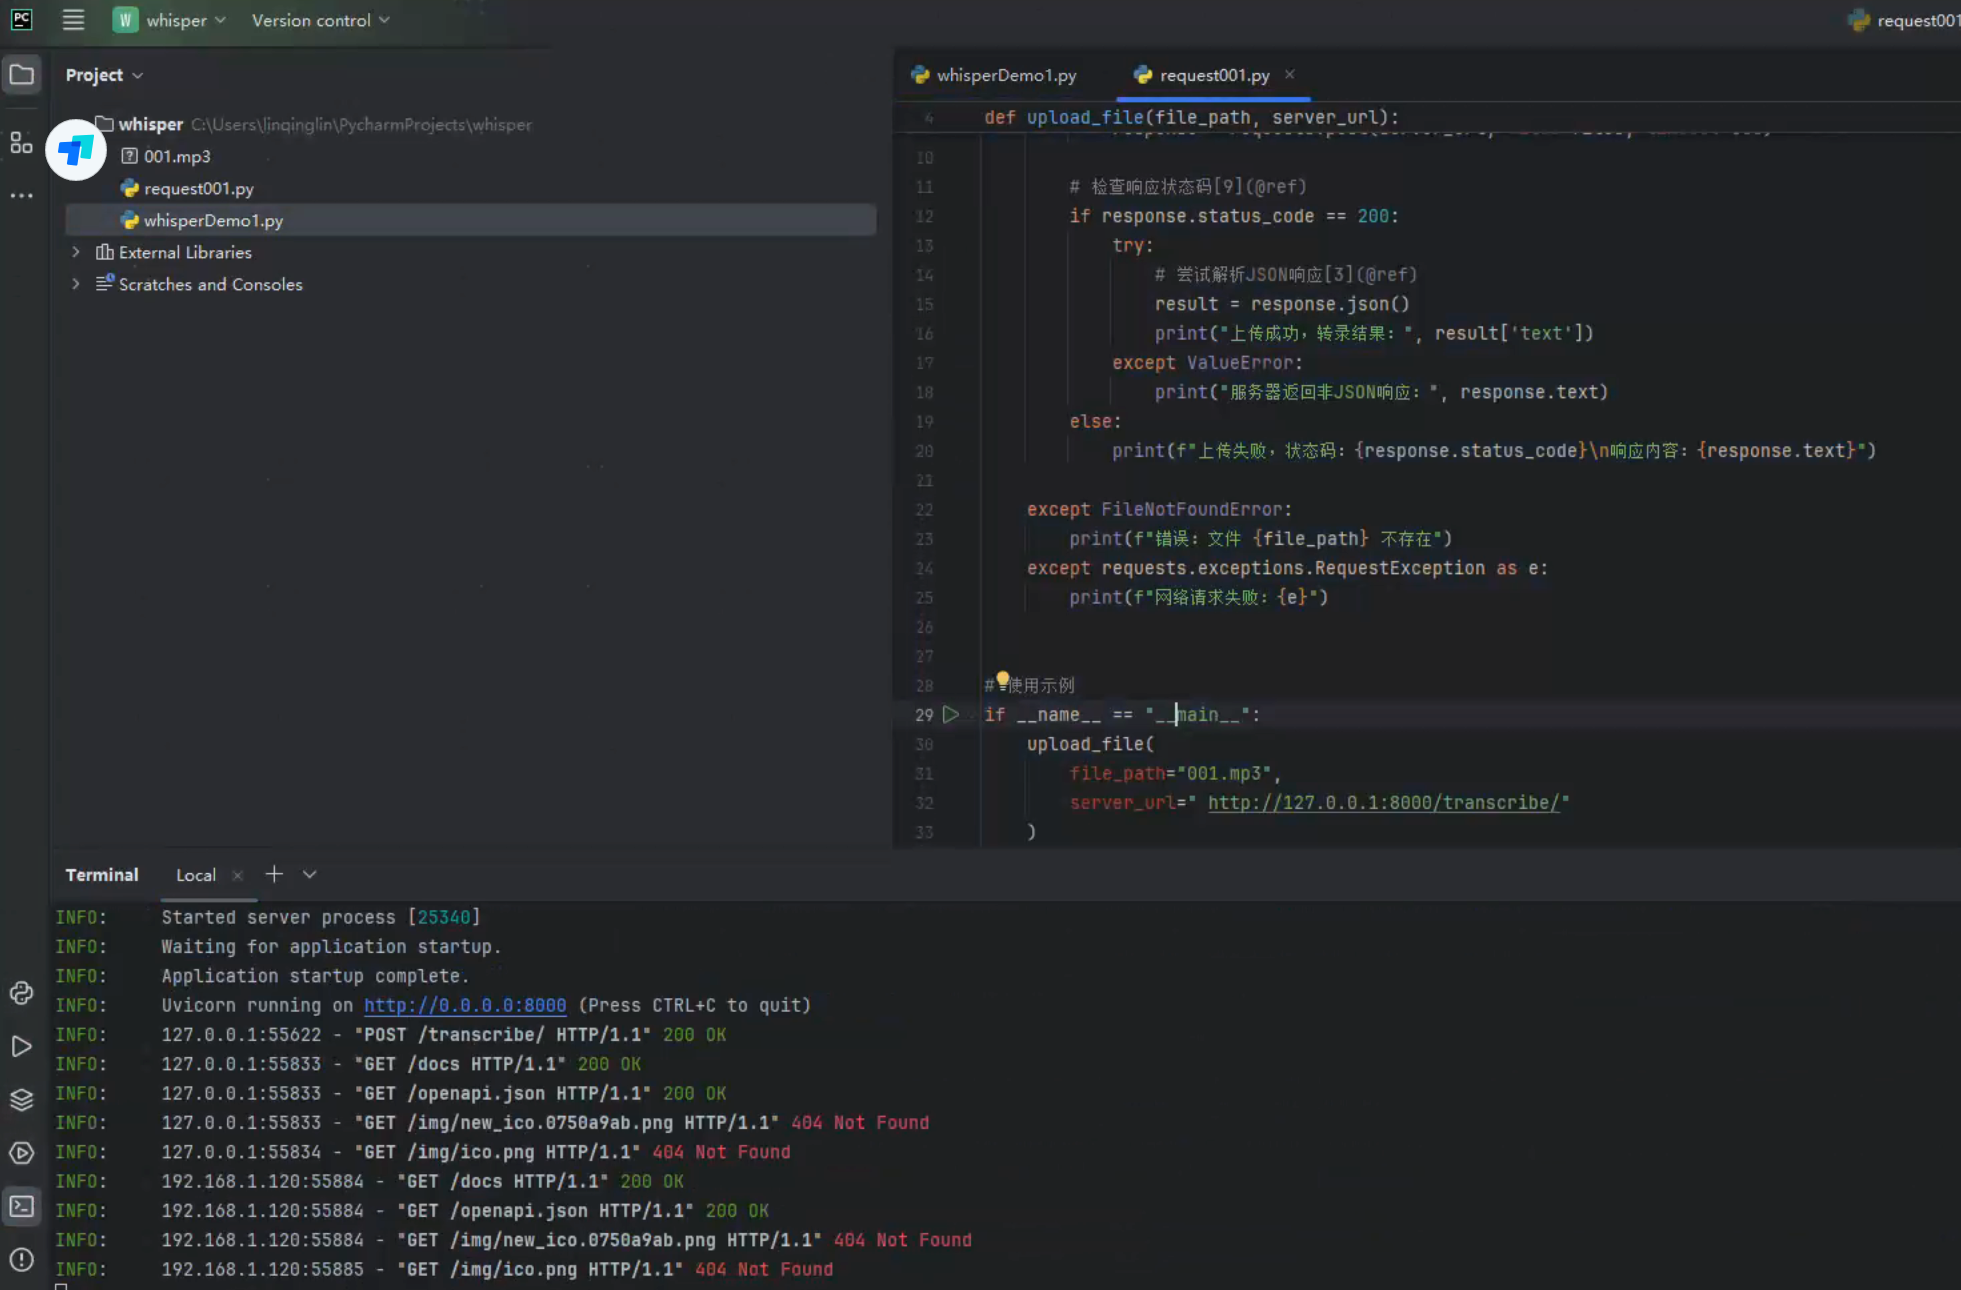
2、创建request001.py
import requests


def upload_file(file_path, server_url):
    try:
        # 以二进制模式打开文件并上传[8](@ref)[9](@ref)
        with open(file_path, 'rb') as f:
            files = {'file': f}
            response = requests.post(server_url, files=files, timeout=600)

        # 检查响应状态码[9](@ref)
        if response.status_code == 200:
            try:
                # 尝试解析JSON响应[3](@ref)
                result = response.json()
                print("上传成功,转录结果:", result['text'])
            except ValueError:
                print("服务器返回非JSON响应:", response.text)
        else:
            print(f"上传失败,状态码:{response.status_code}\n响应内容:{response.text}")

    except FileNotFoundError:
        print(f"错误:文件 {file_path} 不存在")
    except requests.exceptions.RequestException as e:
        print(f"网络请求失败:{e}")


# 使用示例
if __name__ == "__main__":
    upload_file(
        file_path="001.mp3",
        server_url=" http://127.0.0.1:8000/transcribe/"
    )
3、运行whisperDemo1
在终端输入:
uvicorn whisperDemo1:app --host 0.0.0.0 --port 8000可以通过pip安装uvicorn、fastapi
可以验证服务是否 有开启成功
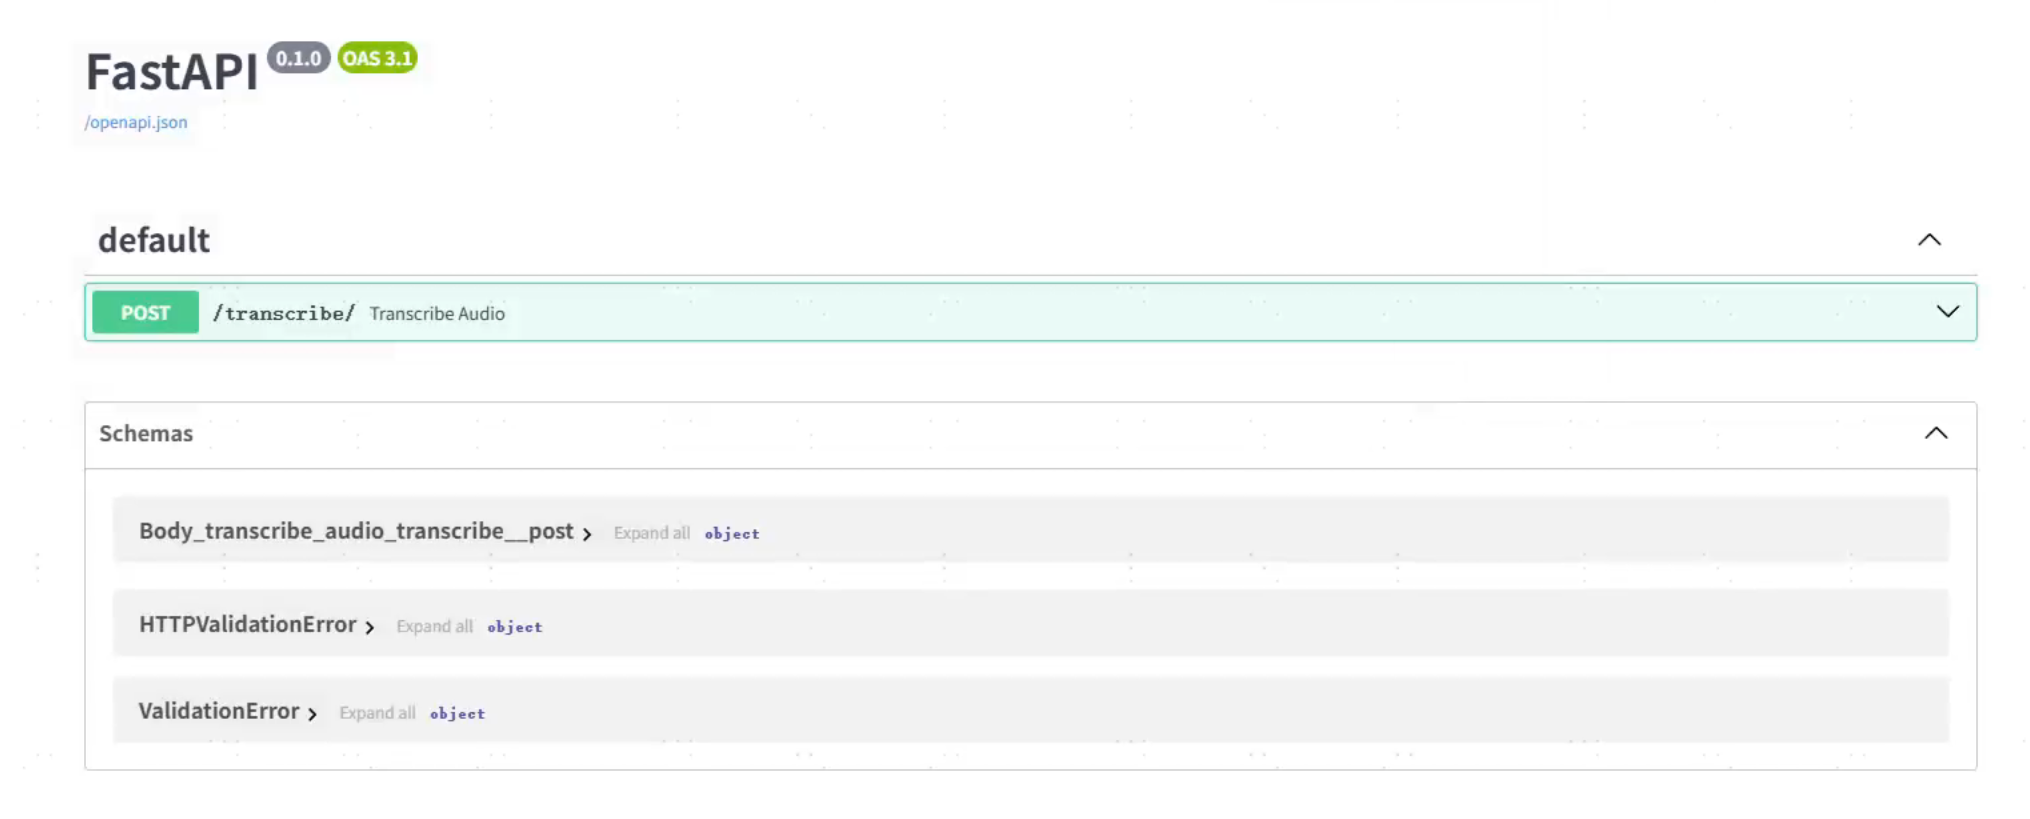
启动后,在浏览器输入:
127.0.0.1:8000/docs
更多推荐

 5
5 0
0- 0


 已为社区贡献2条内容

所有评论(0)